Problem StatementAll glasses wearers
are familiar with the issue of dirty glasses, which not only makes it
more difficult to navigate everyday life due to smudges and debris
buildup on the lenses, but can also pose risks to autonomy and
health. Over 4 billion people around the world wear glasses, making
smudges and debris a widespread problem among all populations, but
especially the autistic community. 13.5% of children with autism have
a vision disorder, compared to only 3.5% of neurotypical children.
Furthermore, individuals with ASD may touch their lenses more
frequently, compounding the issue of dirty lenses — one 17-year-old
with autism was reported to have touched his lenses around 60 times a
day. It is recommended that glasses be cleaned at least once a day to
prevent build-up of debris and oils on the lenses. This task is not
always easy though, as both children and adults with autism spectrum
disorder (ASD), including the client of this project, may struggle to
clean their glasses for a variety of reasons.
Project Overview and Design ApproachThe
goal of this project was to design a device that would automatically
remove smudges caused by finger oils and debris from a pair of
eyeglasses and require minimal maintenance from the client or their
caretaker. The team used an iterative process of brainstorming,
design, and construction to produce a product to meet the client’s
needs. The team used Onshape to 3D model the design, then 3D printed
the design using a Prusa i3 MK3S+ 3D printer and MatterHackers PETG
1.75 mm filament. Four designs, and multiple rounds of rigorous
testing, brought the team to an exceptional final design.
In
each of our design iterations, we attempted to identify as many
issues with the design as possible and brainstorm ways to patch them
in the next design. This followed the general process of discussing
the issue, sketching ideas on paper, adding the best idea to our
virtual 3D model on onShape, and then printing the model to test the
improvements in reality. Through trial and error, we learned the ins
and outs of computer-aided design and were able to create a design
that fulfilled all level one and level two criteria.
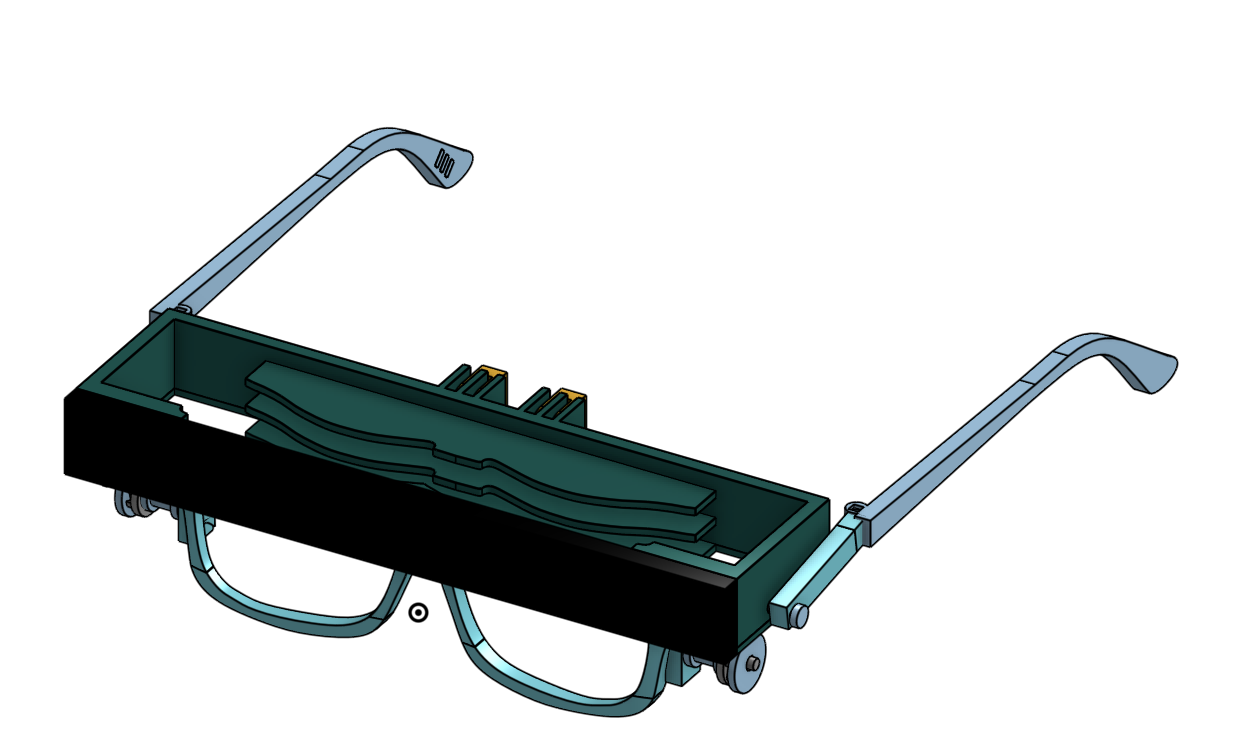
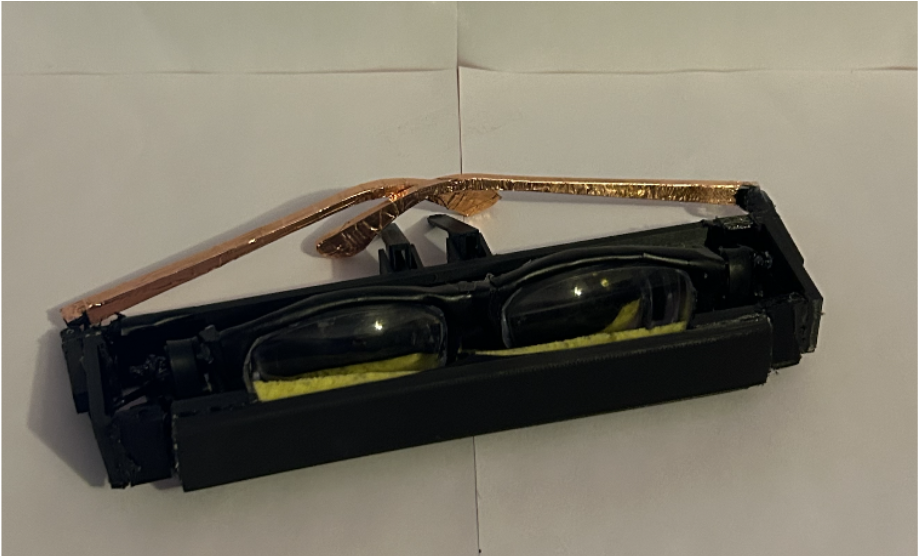
Final PrototypeThe team presents the
Groovy Self-Cleaning Glasses, an innovative piece of eyewear that
assists the user in the cleaning process. This design not only
eliminates the need for the client to remember the variable task of
cleaning their glasses but also sanitizes all of the major contact
areas to help mitigate health risks. All 3D modeled parts can be
found on onShape here. This design is comprised of three major
components: the ratchet-belt system, bar, and legs
Ratchet-Belt SystemThe ratchet-belt
system consists of the following parts: pins, wheel, ratchet, pawl,
belt, and junction. The system allows the belt, and therefore the
bar, to move in only one direction around the lens casing. The
mono-directional rotation makes it so that only one side of the lens
is in contact with the bar at a time, and that during a given pass
the wet sponge is always followed by the dry microfiber cloth. With
the exception of the belt, all of the components of this system were
3D printed Elegoo PLA+ 1.75 mm filament.
BarThe bar is the component that
holds the integral sanitization-fluid-saturated sponges and
microfiber cloth. The bar has three layers. Each layer has a concave
and a convex curve that match the contour of the lenses.
Additionally, on the back of the bar, there are two nose hinges which
allow the nose pins to rotate. The nose pins are placed into the
slits of the nose hinges and are secured by a hinge pin. On the sides
of the bar, there are holes for the junctions to go through.
LegsThe final component is the
copper-covered legs. The legs were modeled after the legs of the
client’s current pair of eyeglasses and were 3D printed in PLA+.
Then, the legs were covered with copper tape. The copper tape covered
the exterior of the design, giving it an antimicrobial property. The
legs were attached to the bar using the hardware from the client’s
old pair of glasses, which allows the legs to hinge as they would in
a standard pair of glasses.

